Create and connect an application with a single command
You can use Cloudflare Tunnel to connect applications and servers to Cloudflare’s network. Cloudflare Tunnel relies on a piece of software, cloudflared, to create those connections.
Tunnels are persistent objects that, once created, do not need to be recreated each time. The connections inside of a Tunnel are ephemeral; your service can restart or be taken offline without deleting and recreating the Tunnel or associated DNS entries.
You can create and configure Cloudflare Tunnel connections to support multiple HTTP origins or multiple protocols simultaneously. Doing so requires the use of a configuration file, which Cloudflare recommends in most use cases. However, if you want to quickly spin up a new Tunnel, you can also use a single command to create, run, and route traffic to a Tunnel.
🗺️ This tutorial covers how to:
- Start a secure, outbound-only, connection from a machine to Cloudflare
- Give the application a hostname where users can connect
- Complete the entire process with a single command using
cloudflared
⏲️ Time to complete:
10 minutes
Install cloudflared
Start by downloading and installing the Cloudflare Tunnel daemon, cloudflared. On Mac, you can do so by running the following brew command. If you do not have Homebrew, follow the documentation to install it.
$ brew install cloudflare/cloudflare/cloudflared
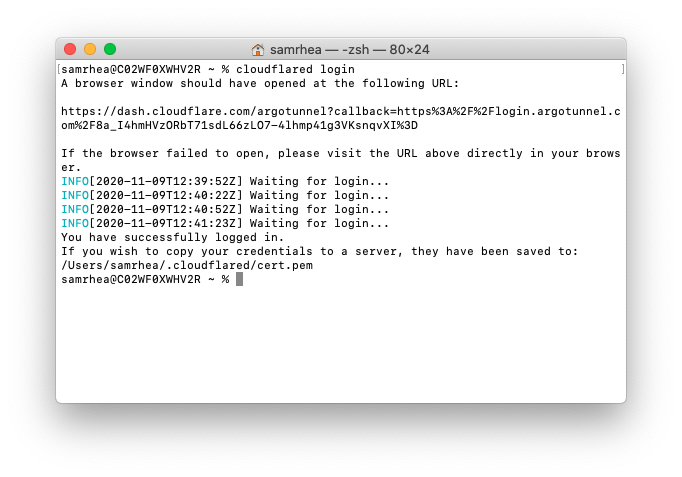
Once installed, run the following command in your Terminal to authenticate this instance of cloudflared into your Cloudflare account.
$ cloudflared login
The command will launch a browser window and prompt you to login with your Cloudflare account. Choose a website that you have added into your account. This will authenticate your instance of cloudflared to your Cloudflare account; you will be able to create a Tunnel for any site, not just the site selected.
Once you click one of the sites in your account, Cloudflare will download a certificate file, called cert.pem to authenticate this instance of cloudflared. The cert.pem file uses a certificate to authenticate your instance of cloudflared and includes an API key for your account to perform actions like DNS record changes.
You can now use cloudflared to control Cloudflare Tunnel connections in your Cloudflare account.

Create and run a Tunnel
You can now create a Tunnel that will connect cloudflared to Cloudflare’s edge. In this example, you can use a single command to perform all of the steps required to connect an application to Cloudflare’s edge. The command will perform the following functions:
- Create a Tunnel with an associated name. That Tunnel can serve traffic for multiple services and multiple hostnames; this example uses a single service and single hostname.
- Create DNS records for the Tunnel. These DNS records will send traffic to the Tunnel. The records created will not be deleted if the Tunnel is interrupted or if
cloudflaredor your origin service restarts. - Configure the Tunnel by sending traffic to the URL specified. In this example, the only configuration argument required is the URL where traffic should be directed.
- Run the Tunnel and begin serving traffic.
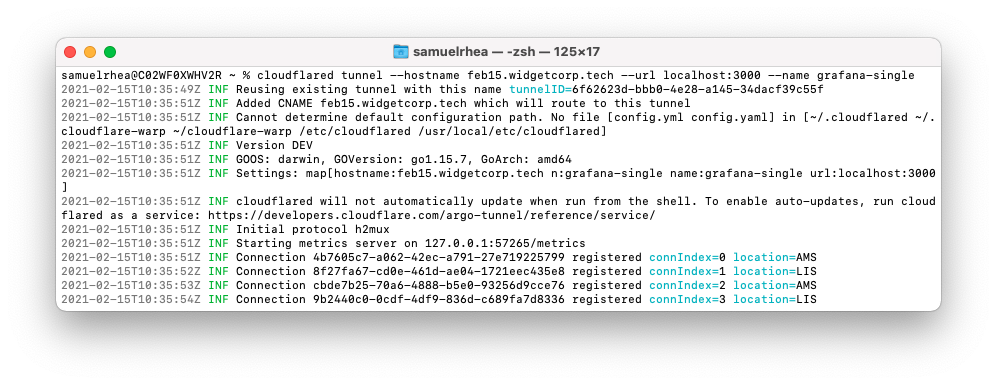
Run the following command to perform all of the functions listed above, replacing the --hostname value with a hostname in your Cloudflare account as well as the --url and --name values with the URL of your service and the name you would like to assign to the Tunnel.
cloudflared tunnel --hostname example.widgetcorp.tech --url localhost:3000 --name grafana

The command above will
- create a Tunnel named
Grafana, - create a persisent DNS record at the
examplesubdomain, and - send traffic directed to that hostname through the Tunnel and to the service available at
localhost:3000.
Manage the Tunnel
You can now stop and restart cloudflared as needed. Stopping cloudflared will not delete the named Tunnel or the DNS record created. If you restart cloudflared with the same command, Cloudflare will recognize that you have already created a Tunnel with that name and that a DNS entry exists and will skip the step to reprovision those entries.
To review the Tunnels that you have created, and their connection status, run the following list command.
cloudflared tunnel list
